Post Date: 04/01/2020
Updated: 27/02/2020
Installing Manjaro ARM Minimal (Raspberry Pi 4)

WARNING
Follow the instructions at your own risk. This guide was written based on my personal research and understanding. Always make sure YOU understand what you are doing before following this or any other guide and be sure to handwrite each command listed. You are responsible for damage which may occur following these instructions be it a bricked Pi, corrupt/dead Micro SD cards, etc. The guide produces working results on the date of writing and may not work in the future. I will try to update any significant changes in the future.
Update (27/02/20)
On 24th February 2020, a new version of Manjaro ARM 20.02 released. If you already have the 19.12 version running to keep it up to date here are the instructions provided on the Manjaro forums post about Manjaro ARM 20.02.
Old releases should just keep on rolling, if you have been keeping it up to date. The minimal install of Manjaro doesn’t come with wget which is required to update the mirror list. Run the following command to install it:
sudo pacman -Syu wget
To install a new mirrorlist, if you see lots of 404 errors when updating (I personally did) run the following command:
wget http://manjaro-arm.moson.eu/stable/core/aarch64/pacman-mirrorlist-20200225-1-any.pkg.tar.xz && sudo pacman -U pacman-mirrorlist-*
To force a full refresh of the package database and update all packages on the system run this command:
sudo pacman -Syyu
You must do this when switching branches or switching mirrors.
For good measure to make sure everything updated correctly reboot the system:
sudo reboot
Also if you have been running the 19.12 for some time you might want to update the kernel to the latest version. You can do this by running:
sudo pacman -Syu linux-rpi4-mainline
If you are notified about conflicts. Agree to remove the conflicting package by entering y. Once again reboot to make sure everything is fine. To make sure you are on the latest kernel run this command:
uname -a
It will show you the kernel running on your Pi 4. The current version as of writing is 5.5.2-1-MANJARO-ARM.
If you want the 20.02 experience, it is recommended to re-install the system. As for Minimal images of the 20.02 update, a member of the Manjaro ARM team says they won’t be coming, however you can create it yourself with the Manjaro ARM Installer. Once you have created the image the install process should be identical or similar to the one described bellow.
Hardware required
- Raspberry Pi 4 Model B (Guide should work on other devices supported by Manjaro ARM but not guaranteed)
- Supported USB-C Power adapter (Official Raspberry Pi Power Adapter recommended)
- Active or passive cooling (Optional but highly advised; Pi 4 can get a little toasty)
- Ethernet connection (Required for setup; can use Wi-Fi later)
- Micro SD Card Reader
Getting Started
- Make sure you have all of your equipment ready.
- You will need another computer to flash the OS onto the Micro SD Card and for SSH later on. In this guide I’ll be using a Windows 10 system.
- Download the following things. Feel free to substitute them with your favourite alternative on your OS/System. Place them somewhere you can easily access like a folder on your desktop:
Manjaro ARM Minimal
Balena Etcher
PuTTY - Install Balena Etcher and PuTTY so that they are ready to go.
Preparing the Micro SD card
Firstly, you will need to prepare your Micro SD card for the Pi. On your PC, we will use Balena Etcher to flash the image of Manjaro ARM Minimal. The latest version as of writing is 19.12. Plug in your Card Reader with the Micro SD card you will be using into your PC and start Etcher. You need to select the image which in our case is the Manjaro image file and then select your Micro SD.
IMPORTANT
Please make sure you selected the correct drive before continuing. The tool will format the Micro SD card and all data currently on it will be deleted permanently.
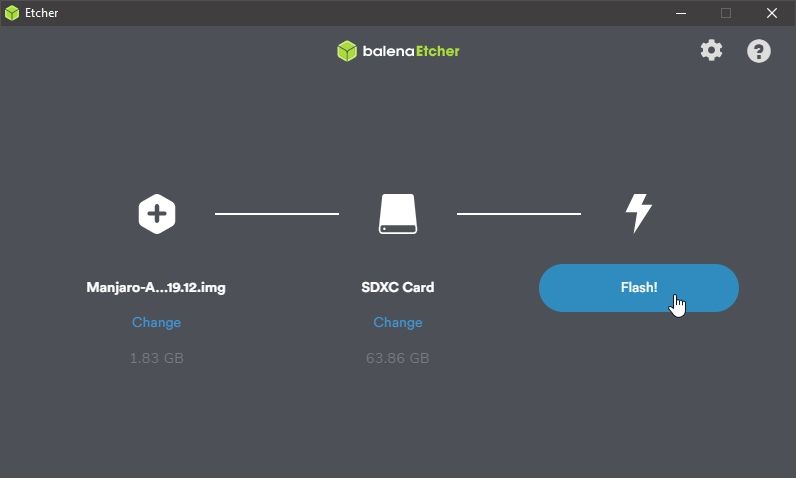
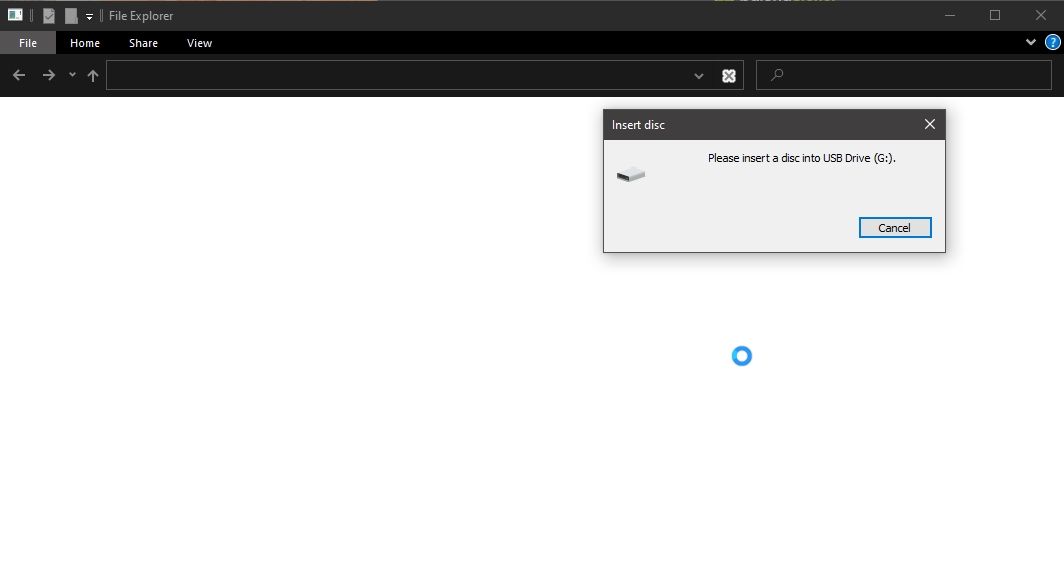
Once you have selected the image and the drive click the Flash! button. The image is quite small so it shouldn’t take long to complete. The speed will vary based on the Micro SD card and Card Reader you are using. Throughout the flashing process you might have the drives popup like shown below. Just close those windows and ignore them.
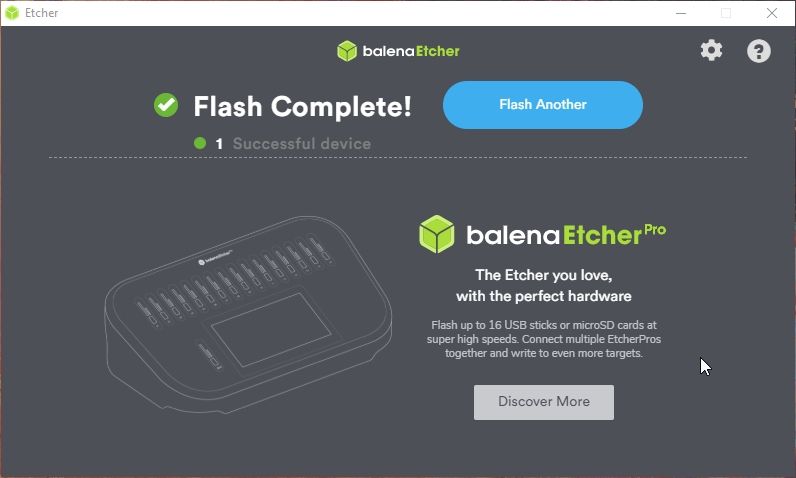
If everything was successful you will receive the following screen on Etcher. Safely unmount the card reader and remove the Micro SD from it.
Installing Manjaro ARM Minimal on the Pi 4
Now that you have a Micro SD card with Manjaro ARM Minimal on it, connect the Ethernet cable, insert the Micro SD and plug in the power supply into the Pi.
With the release of Manjaro ARM 19.08, you can now do a headless setup (no monitor, mouse or keyboard connected to the Pi) by connecting through SSH on another machine. This is the method we will use. Firstly, you will need to login to your router and find a screen where all connected devices are listed. You should see manjaro-arm in the list with the IP assigned to it. You will need to figure this part out on your own since all router interfaces differ. Here is how it came up for me:

As advised earlier you should have PuTTY installed on your other computer already. To access the Pi, open PuTTY and in the Host Name (or IP address) you need to type in root@192.168.0.45. Replace the 192.168.0.45 part with the IP that was assigned to your Pi by your router. Click Open to start connecting.

Click Yes on the Security prompt regarding the key. You should see this screen come up:
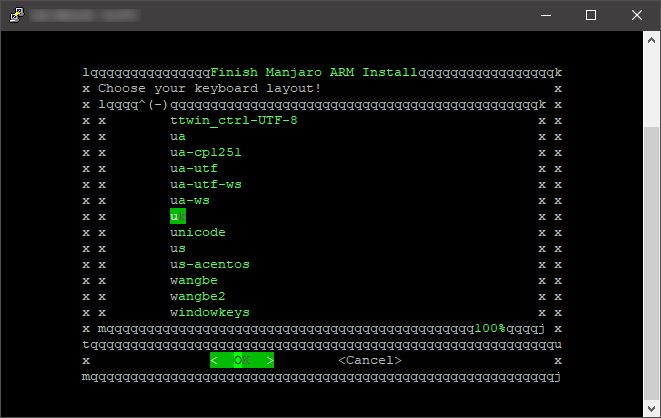
Navigation is Up/Down Arrows to go through lists, Left/Right Arrows to pick between the buttons at the bottom and Enter to click the buttons/confirm. Screens you will encounter:
- Select Keyboard Layout
- Username
- Additional groups (Unless you know any additional groups you might need apart from the ones displayed just click OK)
- Full Name
- Password
- Confirm Password
- Root Password
- Confirm Root Password
- Choose Timezone
- Choose Locale
Go through each screen until you reach the confirmation screen like the one below:

If you made a mistake don’t worry. If you click NO the whole initial setup will restart and you can input the info again correctly. Otherwise click Yes. The Pi will start setting up all the information you gave it and automatically reboot at the end. The SSH client (PuTTY in this case) will lose connection due to this.
Give your Pi up to a minute to reboot, restart PuTTY and reconnect to it using it’s IP address only this time without the root@ prefix. This time you will have to login with the information you put in during the setup. So type in the username you chose click Enter then type in the password and click Enter.
Important
This is not the Root login and password but the user ones! Also typing the password doesn’t show any characters when typing. This is normal.
If all went well you should be greeted with a welcome screen like this:

Congratulations your Pi 4 is now running Manjaro ARM Minimal!
Make sure Manjaro is updated
Before proceeding with anything, we need to check if the OS is up to date. Make sure to do this before installing any packages. Type in the following command:
sudo pacman -Syu
Important
You will be asked to enter your password. When running commands with a sudo prefix the command will run with elevated privileges hence the requirement of a password.
After typing the password and pressing Enter, you should see a similar screen if there are updates:
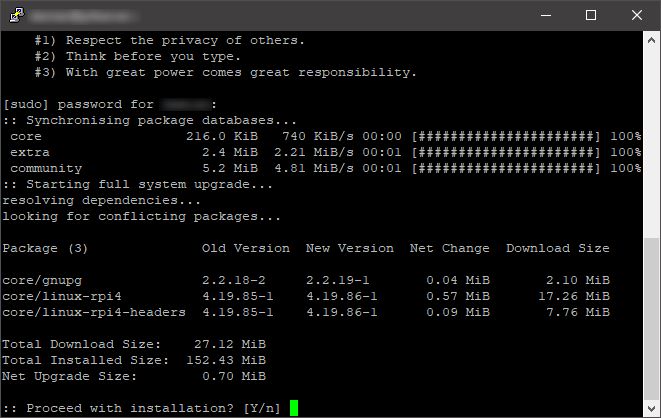
Type y or yes and press Enter to proceed with the update.
Otherwise if there are no updates found you will see a there is nothing to do and you will have control again. Either way it’s a good idea to reboot after the updates complete. To do so type the following command:
sudo reboot
Just like earlier restart PuTTY and reconnect using the Pi’s IP.
Setup Wi-Fi Connection (Optional)
If you need to use the Wi-Fi connection on the Pi instead of the an Ethernet cable here is how to set it up. Sadly, currently there isn’t a way to setup the Wi-Fi before or with the initial setup.
We will need to install a package called NetworkManager to easily setup our Wi-Fi connection. Manjaro uses Pacman as it’s package manager. To install NetworkManager with Pacman type:
sudo pacman -Syu networkmanager
Important
You can install packages with just -S however it is a good idea to use -Syu which will assure the OS is up to date before installing the package. As advised by the Manjaro wiki: “Never install a package without updating the system first. On a rolling release this can lead to an unbootable system.”
Type y or yes and press Enter to proceed with the installation of NetworkManager. When completed reboot the Pi with this command:
sudo reboot
Just like earlier restart PuTTY and reconnect with the Pi’s IP.
Once connected back, we need to start up Network Manager and enable it to automatically start on boot. Type:
sudo systemctl start NetworkManager.service
To start the Network Manager and type:
sudo systemctl enable NetworkManager.service
So that Network Manager automatically starts on boot.
Now once again reboot the Pi with:
sudo reboot
So we can check if the Network Manager is auto starting on boot. Reconnect to your Pi with PuTTY and type:
sudo systemctl status NetworkManager
If everything went well you should get a screen like this stating that the service is active (running) :
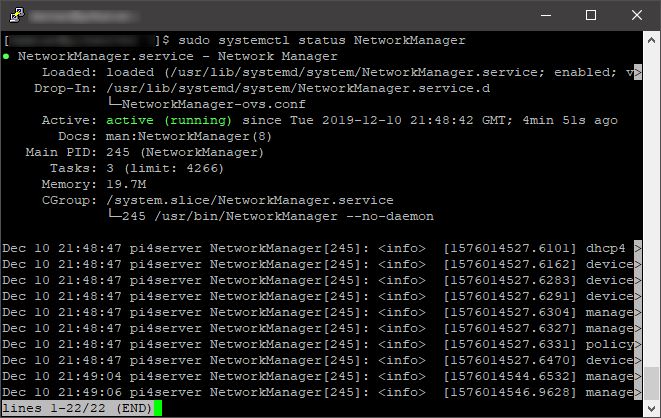
To exit this screen press Ctrl+C.
Now that the Network Manager is up and running you can connect your Pi with Wi-Fi. Type:
sudo nmtui
This command will load up the Network Manager TUI that looks like this:

Just like other Terminal UI the navigation is simple; Arrow keys to move around and Enter to confirm / click buttons. To connect to your Wi-Fi go into Activate a connection , scroll down to your Wi-Fi SSID name then click Enter . Type your password in and hit Enter . If you connected to your Wi-Fi successfully you should see an * before the SSID name of your network. Now you can back out of that screen with Esc . Then go down and click OK . Now type:
sudo reboot
After confirming the reboot command with your password disconnect the Ethernet cable from the Pi. You will need to check on your router what IP has been assigned to your Pi’s Wi-Fi connection. You’ll need this IP to connect to it from now onwards and on first connection you’ll need to accept the Security prompt regarding the key again. After logging into the Pi you can run the following command to make sure you have Internet connection:
ping google.com
You should see connections been made like this:

Press Ctrl+C to stop pinging.
Handy tools to install (Optional)
Htop
Htop is an interactive system-monitor process-viewer and process-manager.
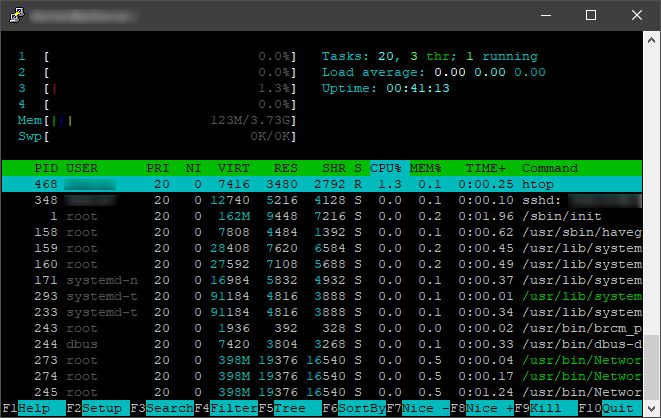
The image shows the system usage on a clean install that followed this guide.
To install Htop run the following command:
sudo pacman -Syu htop
Once installed run the following command to start Htop:
htop
Press F10 to exit.
Neofetch
Neofetch is a command-line system information tool. Neofetch displays information about your operating system, software and hardware in a visually pleasing way.
The image shows the system usage on a clean install that followed this guide.
To install Neofetch run the following command:
sudo pacman -Syu neofetch
Once installed run the following command to start Neofetch:
neofetch
Summary
At this point you should have a fully functional install of Manjaro ARM Minimal on your Raspberry Pi 4. If you’ve found this guide helpful please share it. If you have any questions feel free to drop me a comment on the tweet below!
Along with my new website, here's a step-by-step tutorial on how to install Manjaro ARM on a Raspberry Pi 4! If you follow it let me know how it goes :) https://t.co/6iNQDQMdvU #manjaro #arm #raspberry #pi4
— Damian Korcz (@DamianKorcz_) February 4, 2020